From PDF to Product: The Ultimate Guide to Tin Box Prototyping & Sampling
You have vetted your supplier (see our [Audit Guide]), and you have a killer design on your computer screen. Now comes the moment of truth: Will the actual tin box look like the design?
In mass production, "guessing" is expensive. A color mismatch or a sizing error on 50,000 units can be a disaster. That is why at JB Packing, we never rush to mass production. We guide our clients through a rigorous Prototyping Phase.
Here are the 4 levels of prototyping we use to bridge the gap between your idea and reality.
⚡ Quick Summary: Which Sample Do You Need?
Level 1: 3D Rendering: Best for quick visual checks (Fast & Free).
Level 2: ABS Plastic Mockup: Best for checking size and fit with your product.
Level 3: Flat Metal Proof: Best for checking color accuracy on actual tinplate.
Level 4: The "Golden Sample": The final, fully functional pre-production sample.
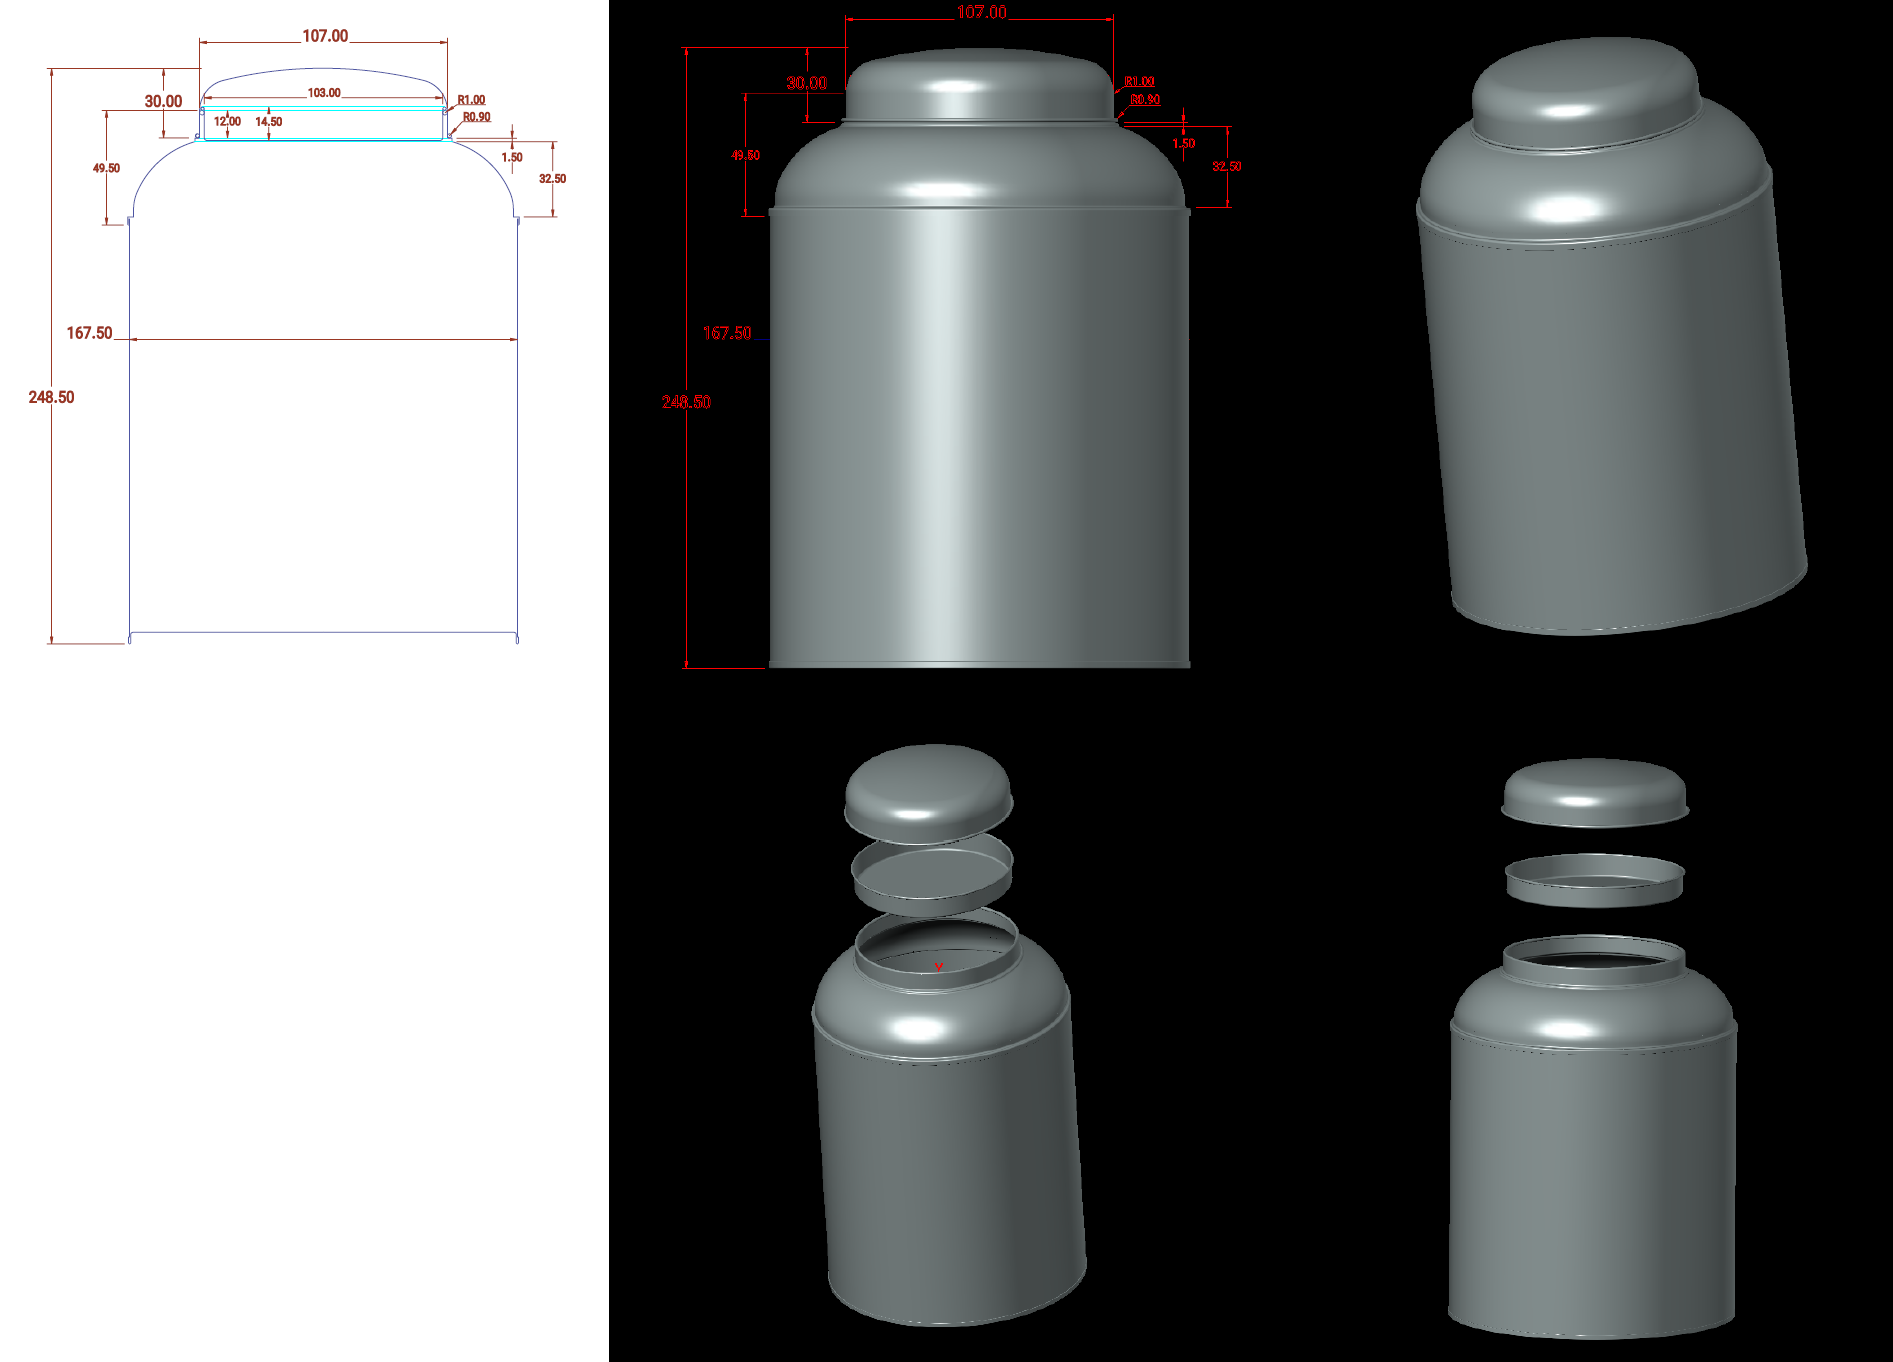
Level 1: Digital 3D Rendering (Visualizing the Concept)
Before we cut any metal, we build it virtually. Our engineering team converts your 2D artwork (die-line) into a photorealistic 3D Rendering.
Purpose: To see how the artwork wraps around corners and how the [Matte vs. Glossy finishes] interact with light.
Cost/Time: Usually included in our service; takes 24-48 hours.
Level 2: ABS Plastic Mockup (Checking the Fit)
If you are creating a New Mold, you need to ensure your product (e.g., a perfume bottle or biscuit tray) fits inside perfectly. We use 3D Printing (ABS Plastic) to create a physical model of the tin shape.
Purpose: Size verification. It won't look like metal, but it allows you to test the internal dimensions and stacking.
Pro Tip: Always do this before paying for expensive metal molds.
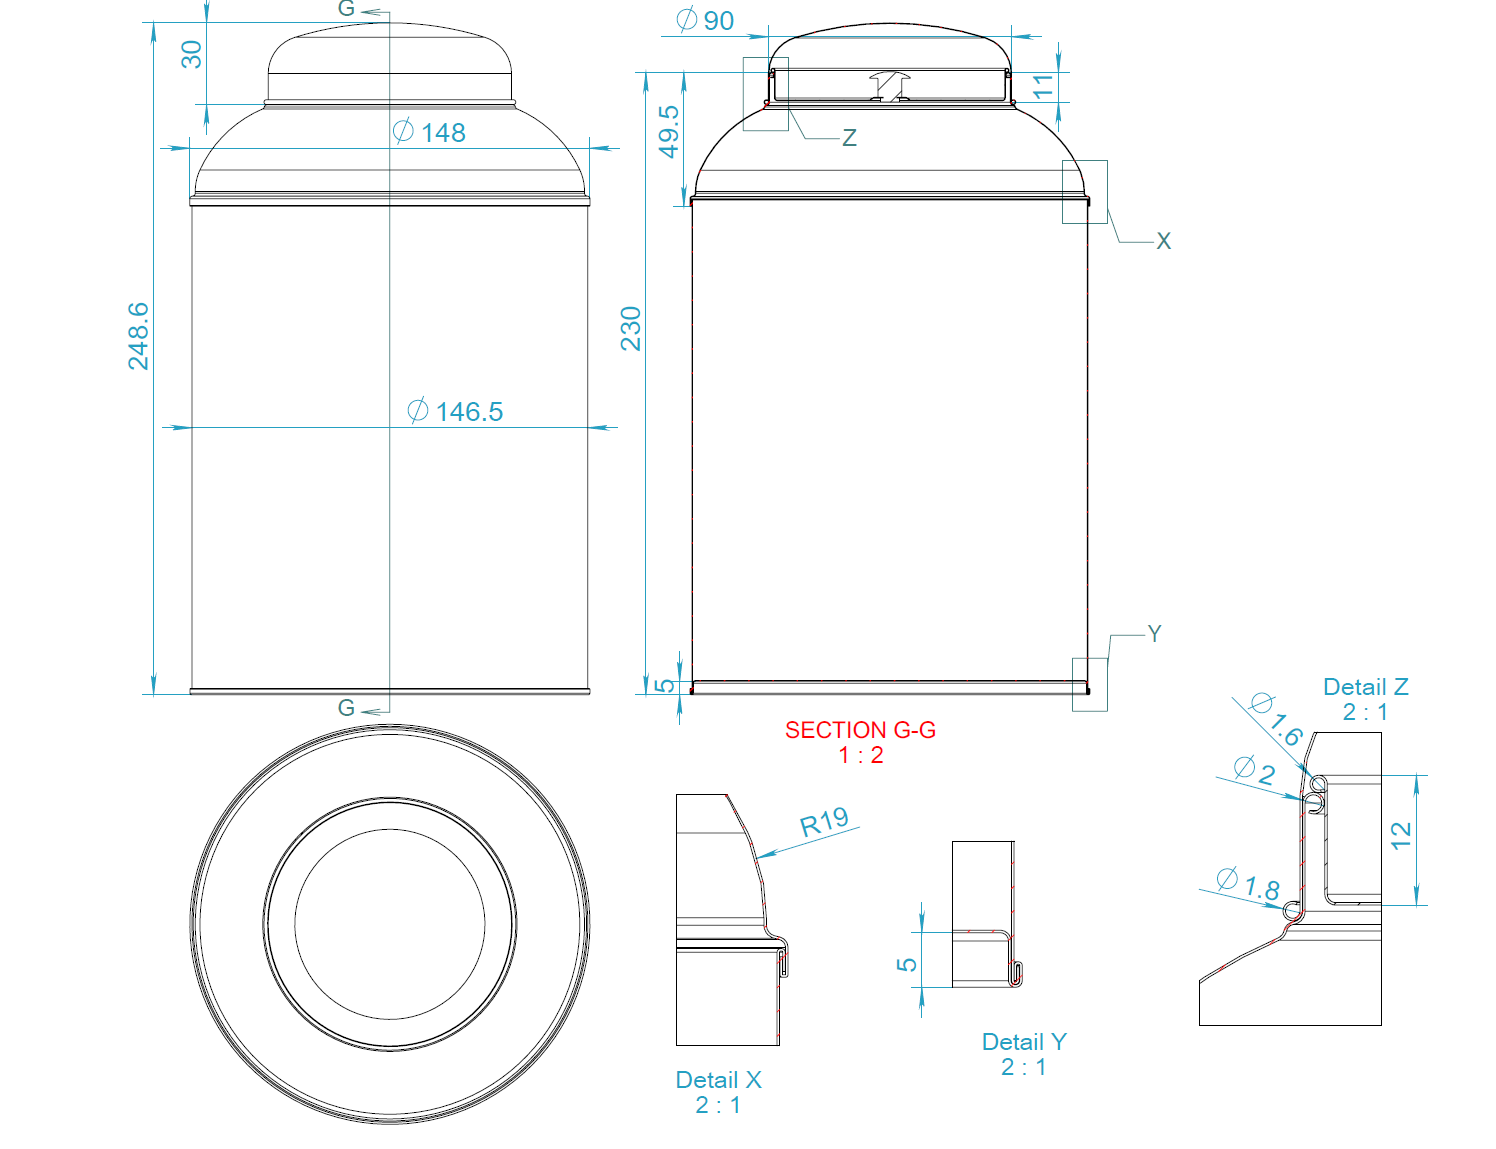
Level 3: Flat Metal Proof (Color Accuracy)
Computer screens lie. The only way to know exactly how your "Pantone 286C" Blue looks on metal is to print it. A Flat Metal Proof is a printed sheet of tinplate that hasn't been cut or formed yet.
Purpose: To approve color fidelity. Metal absorbs ink differently than paper; this proof shows you the real saturation and texture.
(Related: Read about our [CMYK vs. Spot Color Printing] process.)
Level 4: The "Golden Sample" (Pre-Production Sample)
This is the final step. We produce a small batch (usually 5-10 pieces) using the actual mold and the approved printing.
The Rule: Once you sign off on this "Golden Sample," it becomes the legally binding standard for the entire mass production run. The factory QC team uses this sample to check the 50,000 units that follow.
💡 FAQ: Prototyping & Costs
Q: How much does a custom tin sample cost?
A: It depends on the complexity. A fully printed, custom-molded sample can range from $200 to $500 due to the machine setup time. However, this cost is often refundable if the order quantity exceeds a certain amount (e.g., 20,000 units).
Q: Can I skip the physical sample to save time?
A: We strongly advise against it for custom prints. However, for urgent orders using Existing Molds, you can sometimes approve a "Flat Metal Proof" for color and a "Plain Tin" for structure to speed up the process.
Q: How long does sampling take?
A: Standard sampling takes 7-10 days after artwork approval. Developing a new mold + sampling takes 3-4 weeks.
The Bottom Line: Measure Twice, Cut Once
Prototyping isn't an "extra cost"—it's your insurance policy. It ensures that when your container arrives at the warehouse, it's exactly what you dreamed of.
Ready to see your design in real life? [Send us your artwork] today for a free 3D evaluation.